Tool: The MusicFirst Recorder
Sometimes the simplest tools are also the most useful. Perhaps the single most impactful thing that I ever did with my band students was to record them. Whenever I recorded a snippet of a rehearsal and then played it back for them, it was the easiest way to demonstrate things like balance, intonation, blend, tone, and more. I once took a lesson from the beloved tuba player, Sam Pilafian. At that lesson, Sam told me that the single most important thing that I could do to improve as a tuba player was to record myself. He took nearly the entire hour of my lesson to explain why it was so important. If you ever want to be instantly humbled as a musician - record yourself and listen back to it. For those of you who have, am I right? When dealing with students, the same principle applies. That’s why I designed a built-in audio recorder into every MusicFirst Classroom subscription. It is a very simple interface, and students can access and record into it at any time. To access the recorder, simply click on the Software tab at the top of any MusicFirst Classroom subscription, and select MusicFirst Recorder.
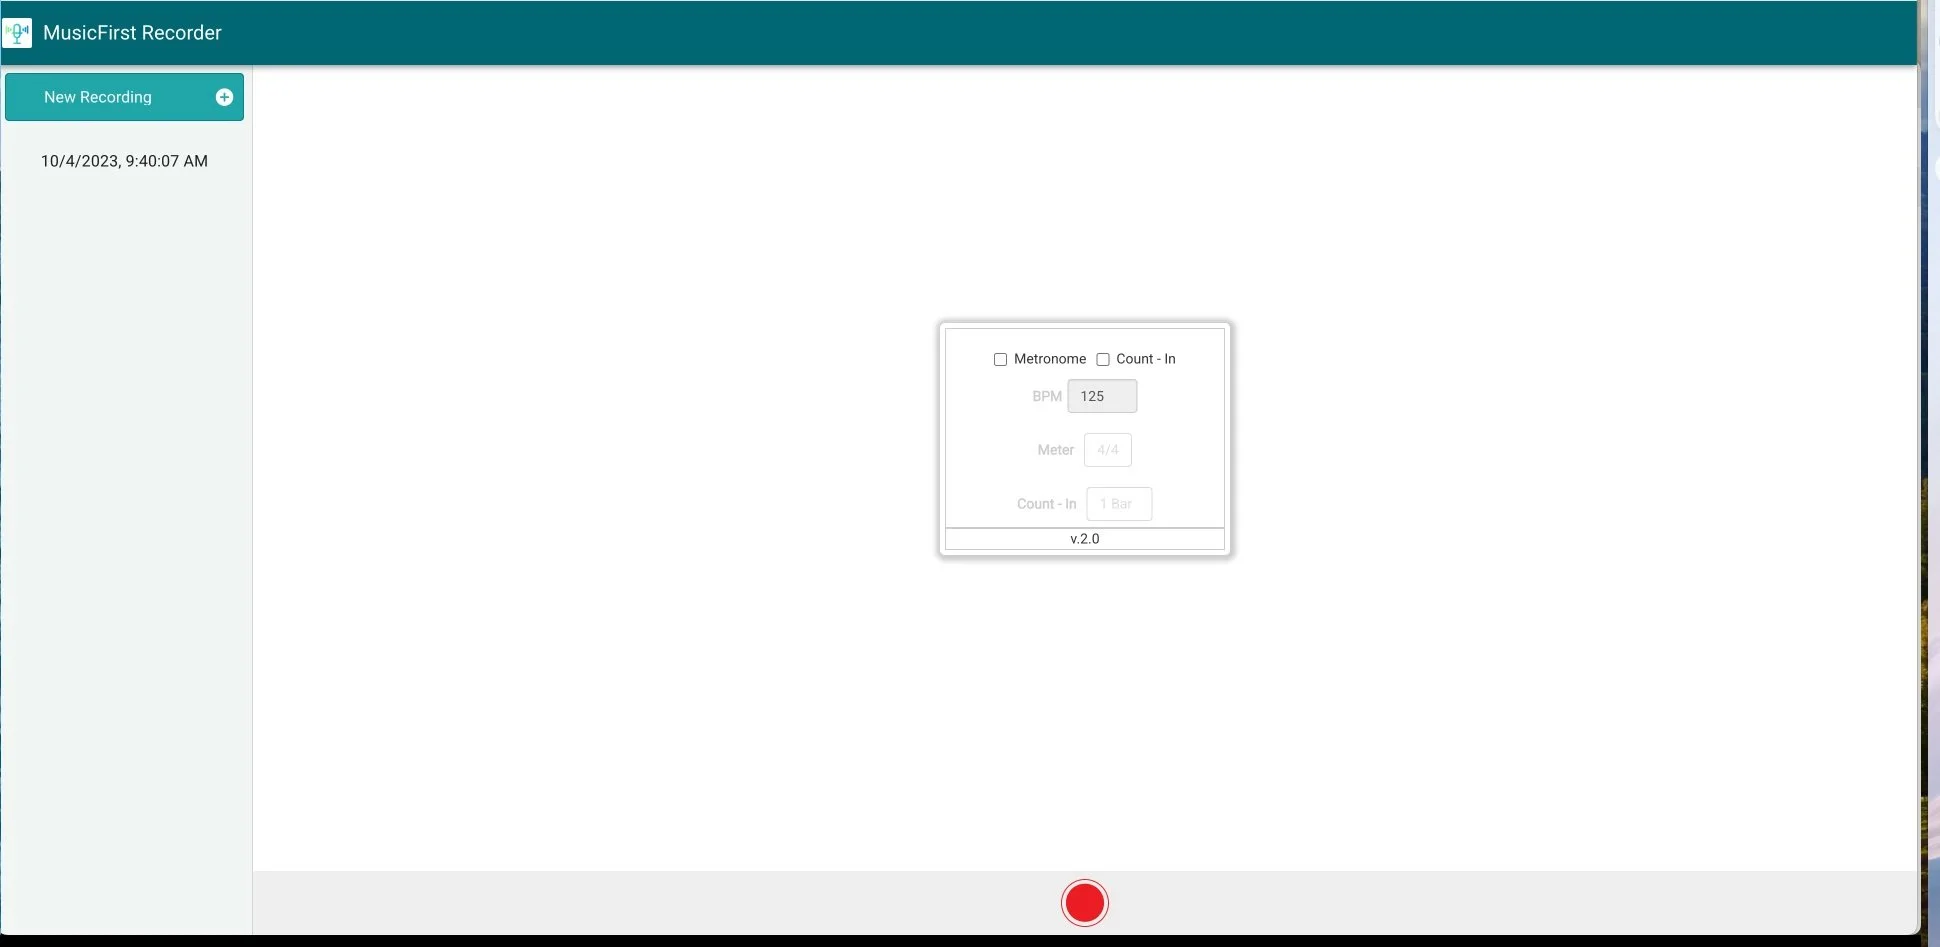
Once the MusicFirst Recorder launches, you’ll see this very simple interface:

On the left side, you’ll see a list of all the recordings you’ve made and in the center of the screen, you’ll see a standard recording interface, complete with various options, including a metronome, a count-in, tempo, meter, and how many bars of a count-in you’d like. Simple. The MusicFirst Recorder can use ANY standard microphone, including a built-in microphone or any other mic option through an audio interface. Once you’re ready to start recording, click on the big red Record button at the bottom of the screen. If you’ve selected metronome and count-in, you’ll hear preparatory clicks before you start recording. If you’re not using those options, you can record right away. Here is what students will see once they’ve pressed record:
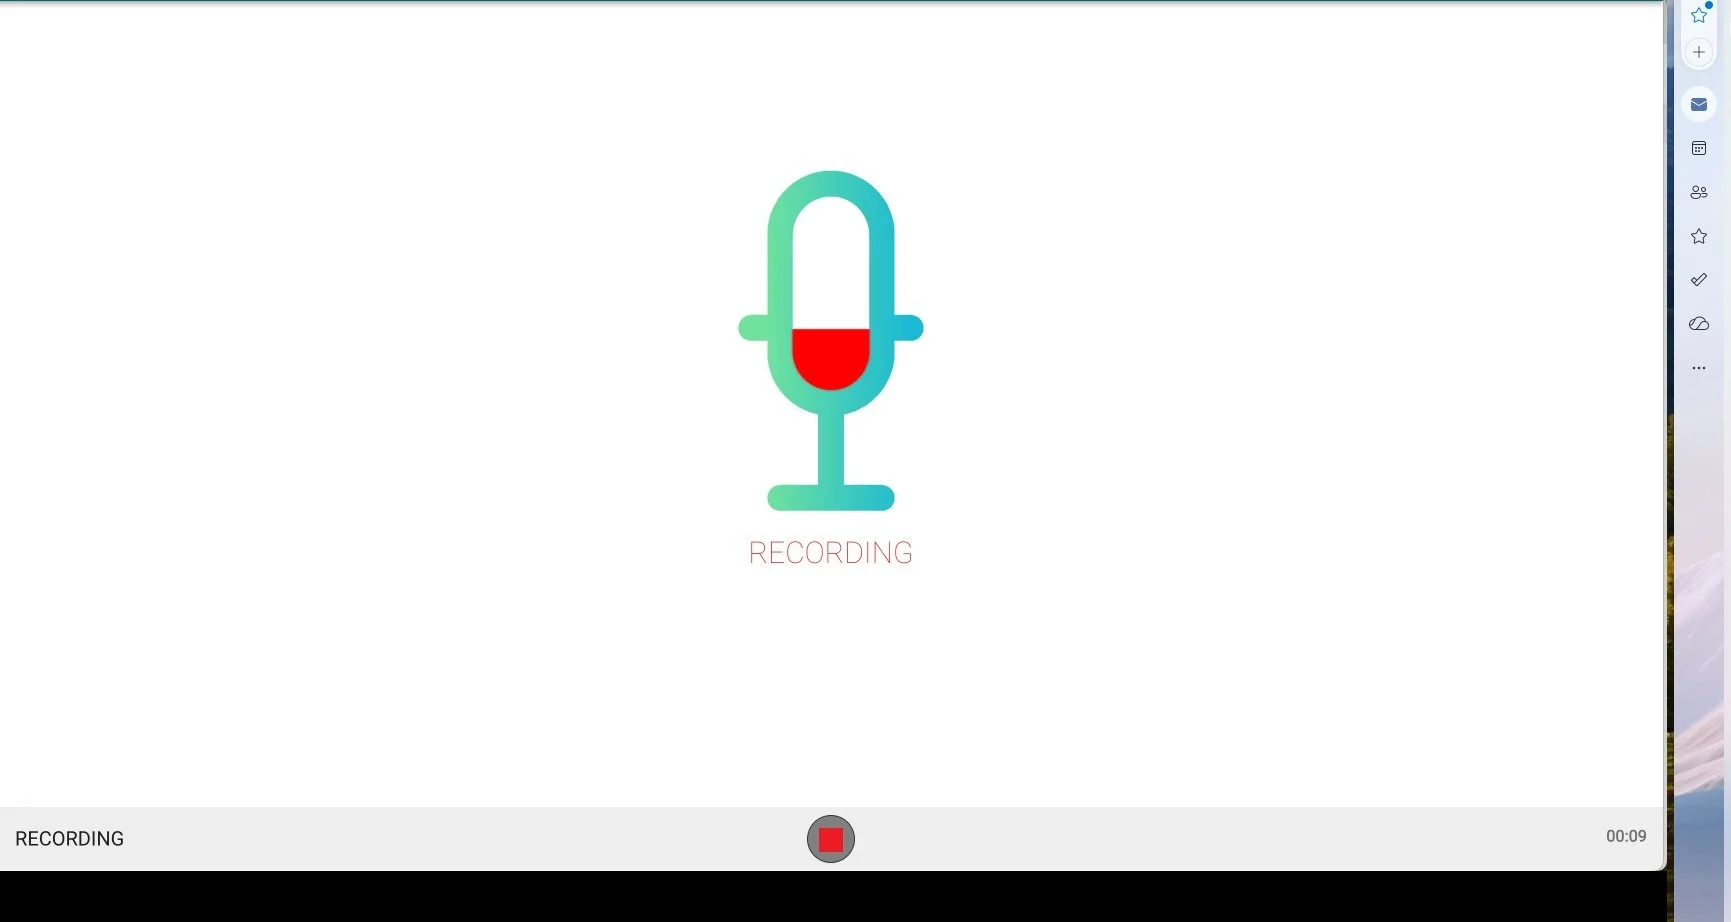
Your students will know that they’re recording if they see the red fill in the center of the microphone icon moving with the audio. After they’re done recording, click on the red Stop button. When they do, they’ll see this:
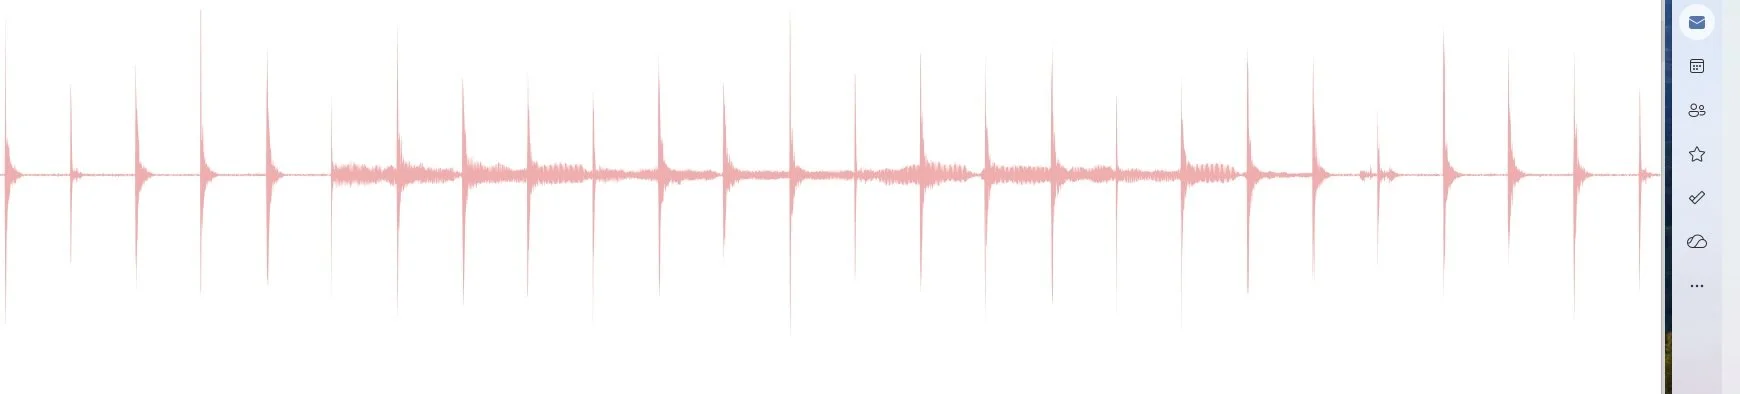
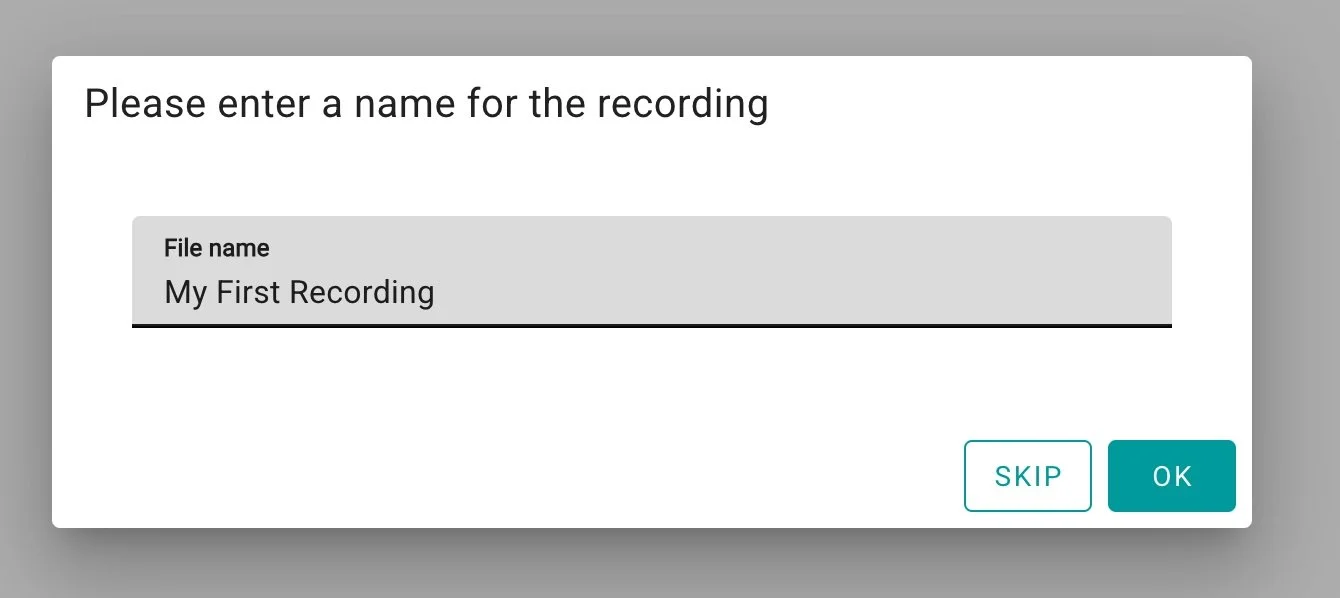
At the bottom of the screen they’ll then see two options: Re-Record on the left or Save Recording on the right. If they are happy with what they’ve recorded, they’ll then need to name their recording and click Save.
It’s as easy as that! Now if you’d like your students to submit recordings as homework assignments, the MusicFirst Recorder is even more powerful. When you create a Task in the MusicFirst Classroom for your students and you’d like to use the recorder, follow these steps:
Create a Task (There are two locations where you can begin the process of making a Task, the left-hand navigation bar + and the Class Overview. From either of these locations press + Create > Task. )
Select Software from the Tool menu.
Choose MusicFirst Recorder as the selected software.
Once you’ve created the task, you’ll see something that looks like this:
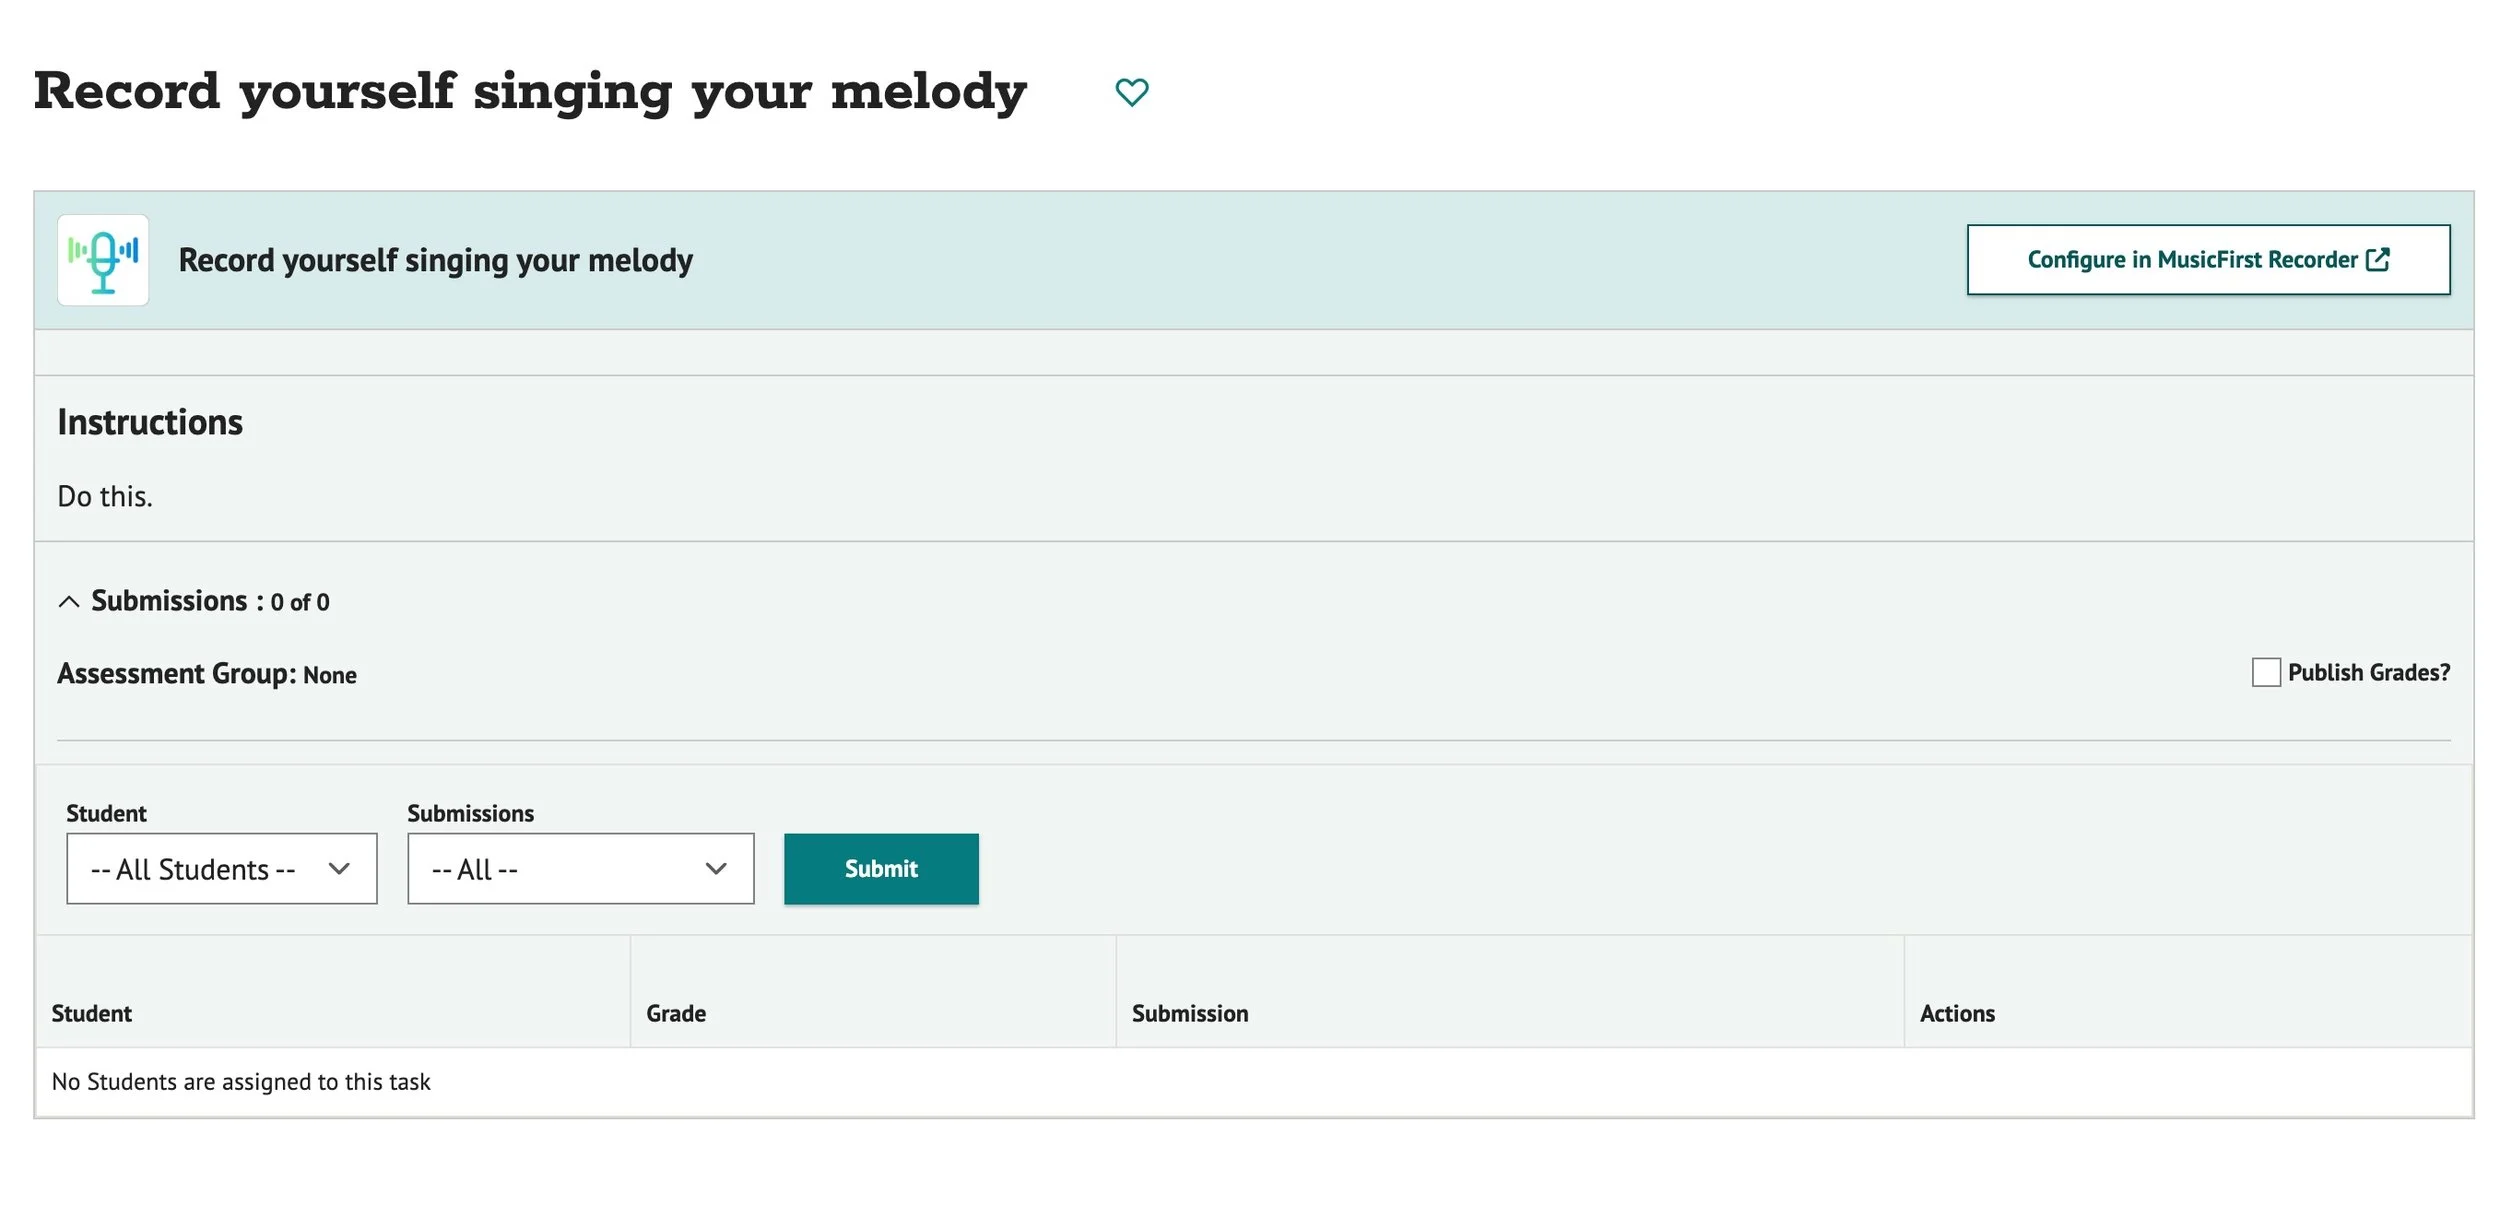
Next, clickConfigure in MusicFirst Recorder. You’ll then see this list of options:
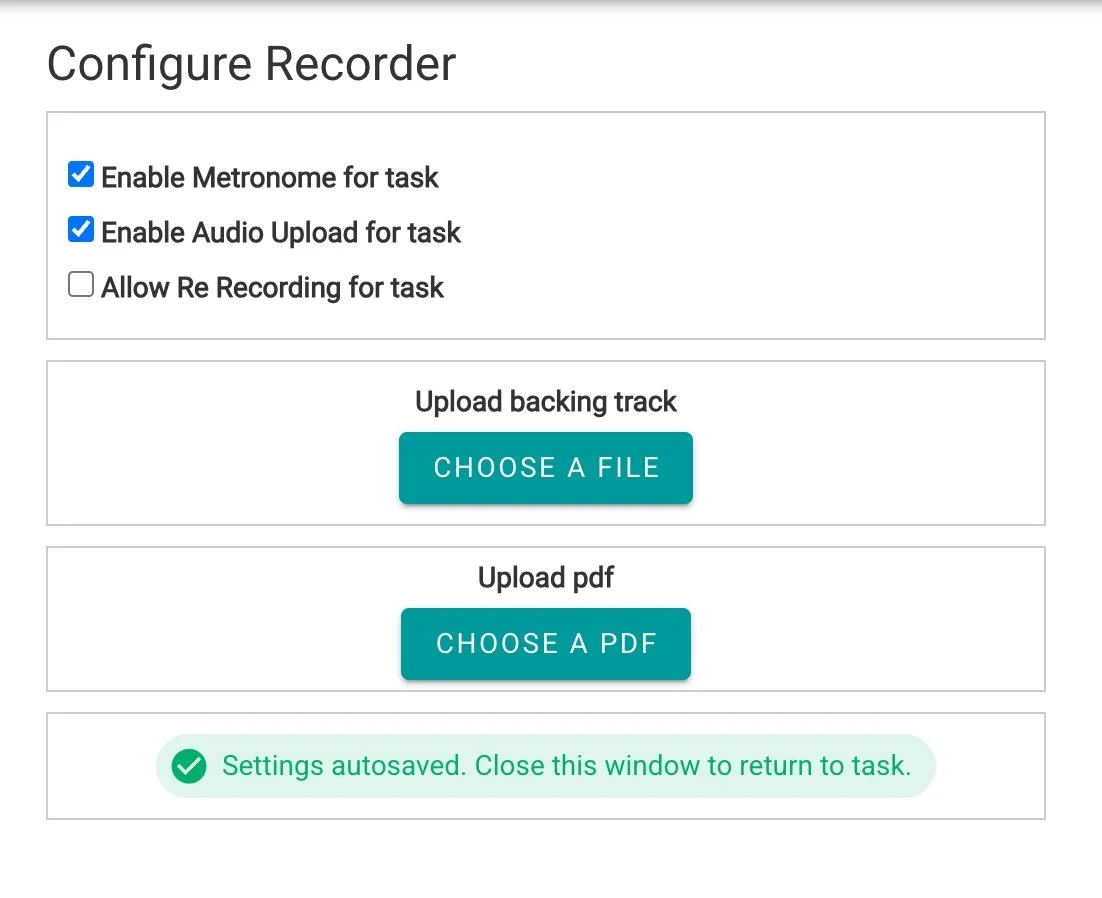
Here you can decide to upload an audio backing track, a PDF of the music that you’d like them to perform, or BOTH. You can also decide whether students can use a metronome, upload their own audio recordings, or allow them to re-record if they’re not happy with their initial attempts. In the example below, I uploaded a PDF of Debussy’s Syrinx for Flute. This is what students will see when they open the task:
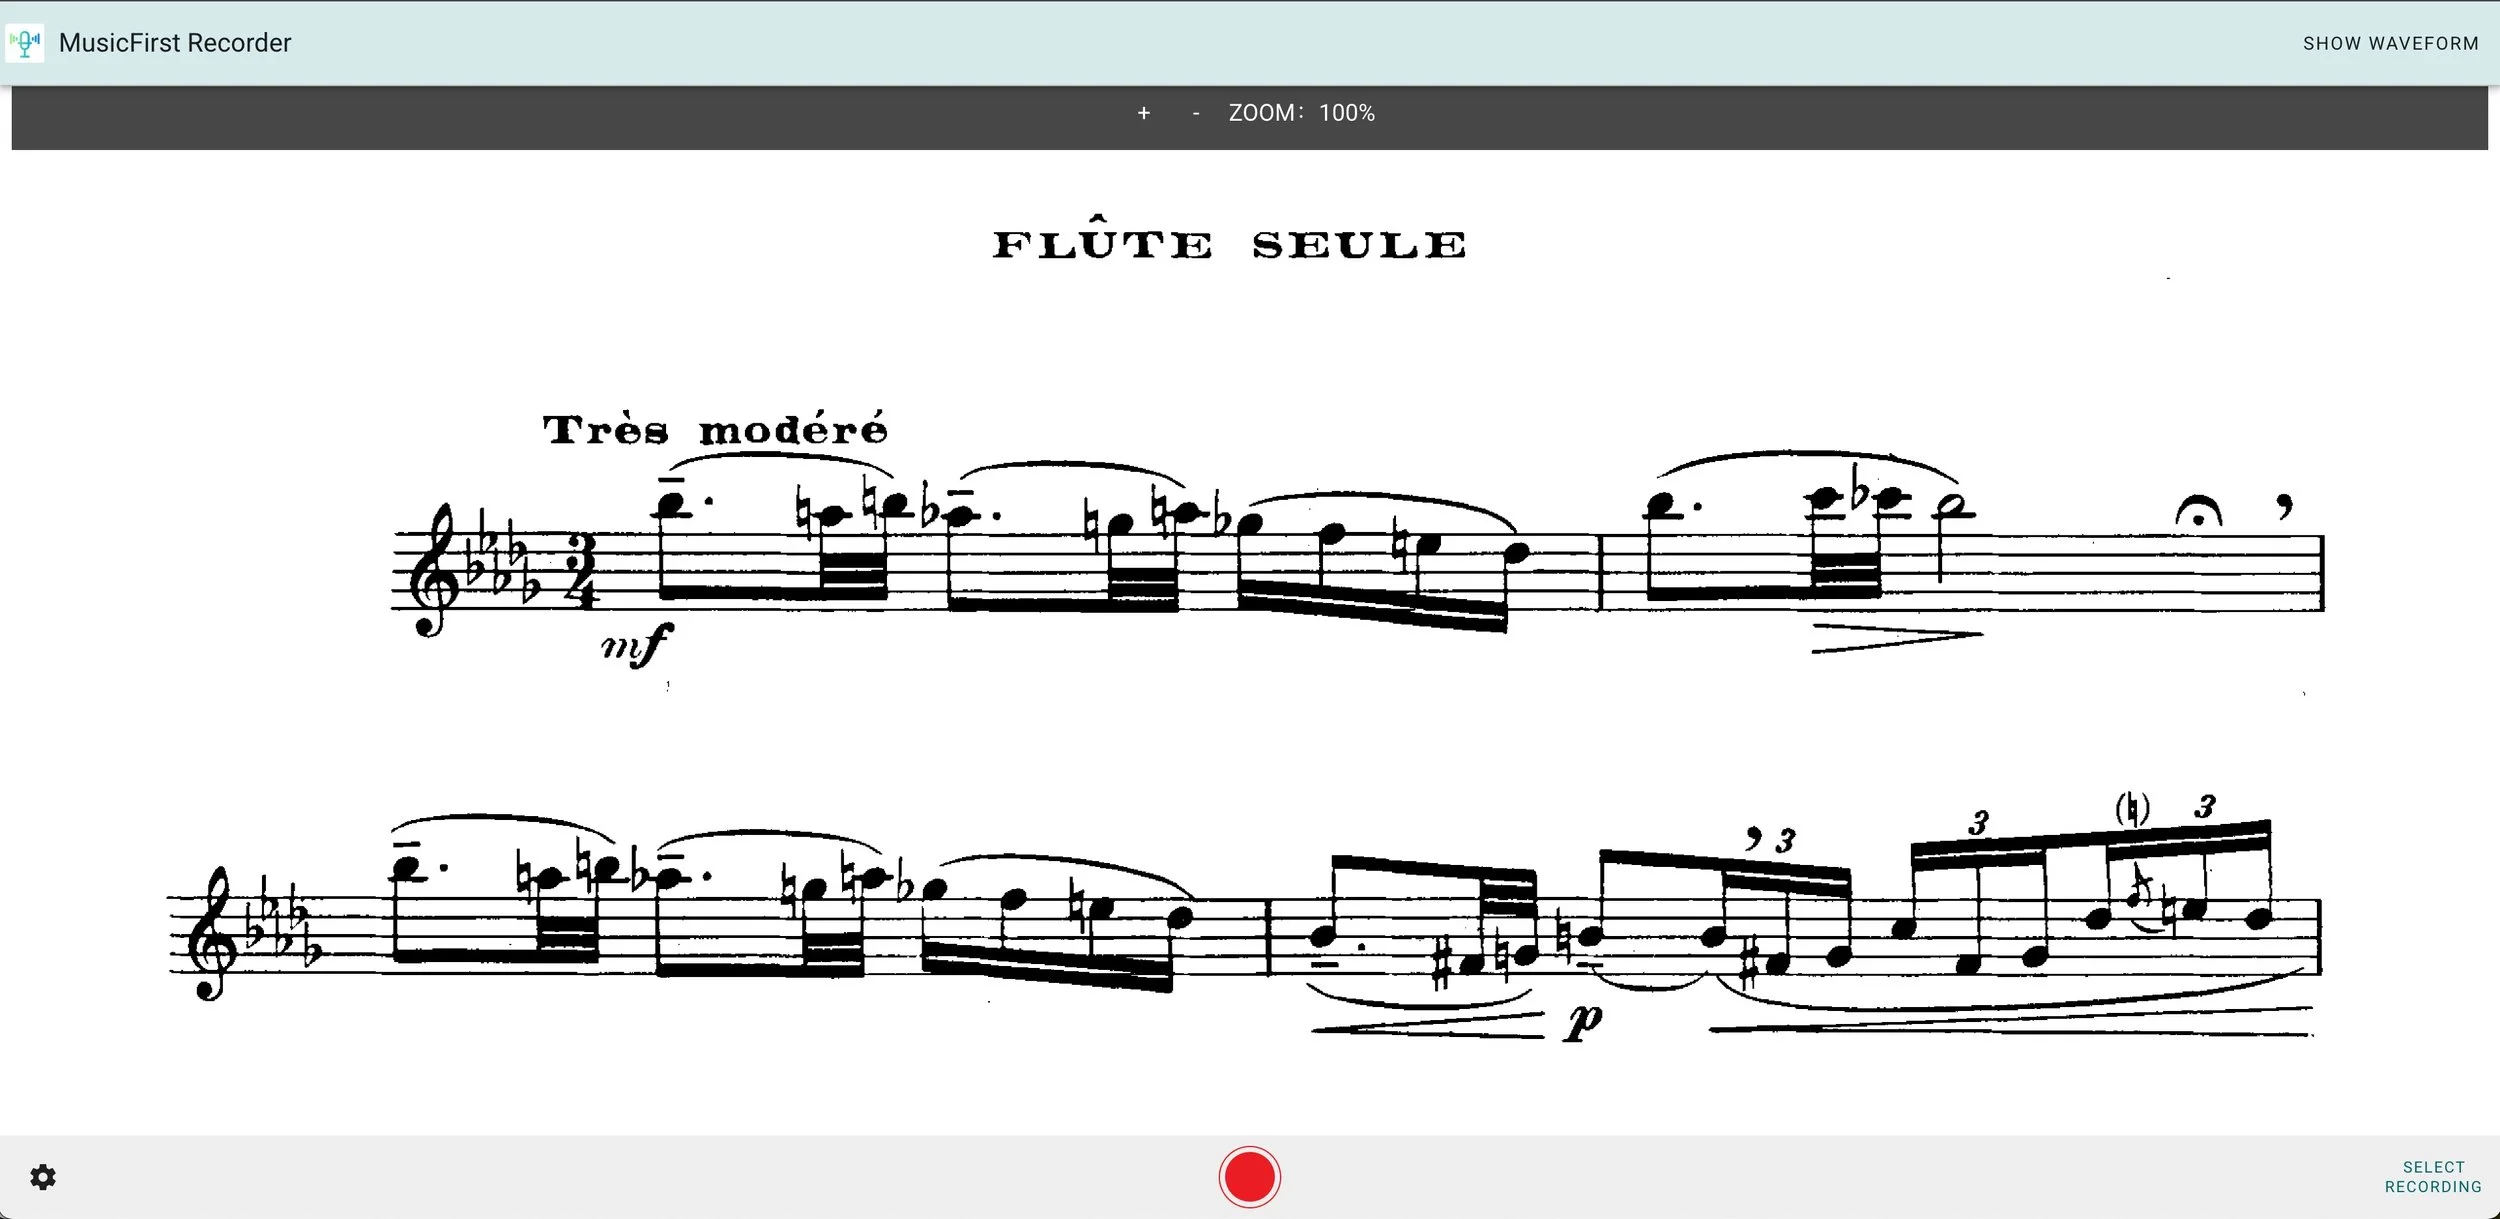
From here, all the student will need to do is press record, and then Submit when they are finished. All submitted student recordings will come back to the Class Gradebook, making it really easy for you to access and assess their work. How cool is that?
If you would like to try out the MusicFirst Recorder with your students, and you’re not yet a subscriber, simply fill out this form to get a FREE 30-day trial. Enjoy!